MoniBridge / How to use
Your brightness.
Your rhythm.
Follow each part of the menu to set up brightness and automatic dimming.
Explore the guide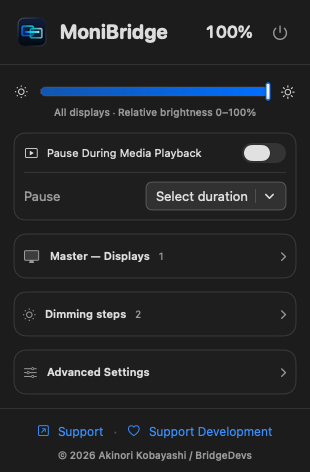
01 / Everyday brightness
Adjust everyday brightness
Use the top slider to adjust the selected screens together.
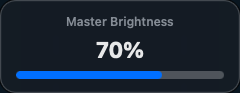
OSD shown when using a shortcut
- Click the MoniBridge menu bar icon to open the menu.
- Move the brightness slider to a comfortable everyday level.
- This value is saved as everyday brightness and becomes the level restored after automatic dimming.
- Use Control + Option + F2 to increase brightness and Control + Option + F1 to decrease it. Change these keys under Master + and Master − in Advanced Settings.
- A shortcut briefly shows an OSD near the top center of the screen. Its Master Brightness percentage and bar show the new value. This is shared relative brightness, not measured luminance for each monitor.
02 / Stay focused
Pause dimming for playback or focused work
Useful when watching a video or reading without using the mouse or keyboard.
- Turn on Pause During Media Playback to pause dimming while a playback app prevents display sleep.
- For a timed pause, open Select duration under Pause and choose 5, 15, 30, or 60 minutes.
- Everyday brightness is maintained during the pause. Check the resume time, or resume manually before it expires.
03 / Your displays
Choose displays and ranges in Master
Bring different monitors closer to a consistent brightness. Adjust maximum and minimum brightness independently for each display.
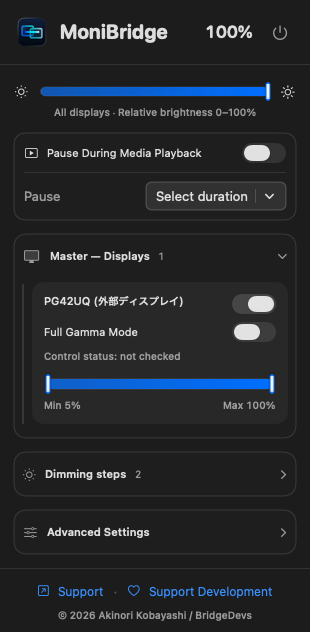
- Click the arrow on the right of Master — Displays to expand it.
- Enable the display you want to control. Use the left handle of the range slider for the minimum and the right handle for the maximum; check the values below.
- Compare the screens at their bright and dim ends, tuning each maximum and minimum. Then move the shared slider and check intermediate levels and automatic dimming to bring the screens as close as possible, even across different manufacturers.
04 / Your rhythm
Set dimming delays and brightness levels
Reduce brightness in stages as idle time increases.
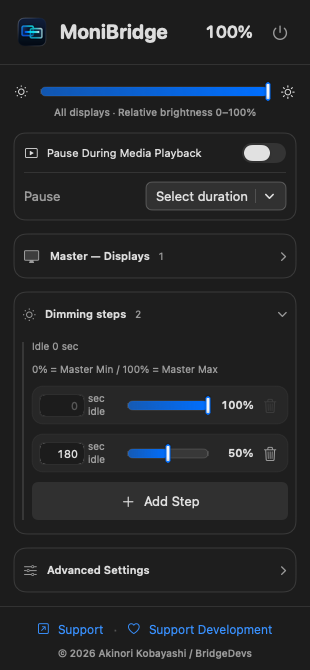
- Click the arrow on the right of Dimming steps to expand it.
- Use Add step to add a row, then edit its delay in seconds and brightness slider. Remove an unwanted row with its trash button. For example, use 70% after 180 seconds and 40% after 600 seconds. The zero-second base step is fixed.
- Leave the mouse and keyboard idle to check dimming. Resume activity to return immediately to everyday brightness.
05 / Fine tuning
Fine-tune behavior in Advanced Settings
Adjust fading, the brightness floor, launch at login, reset settings, and more.
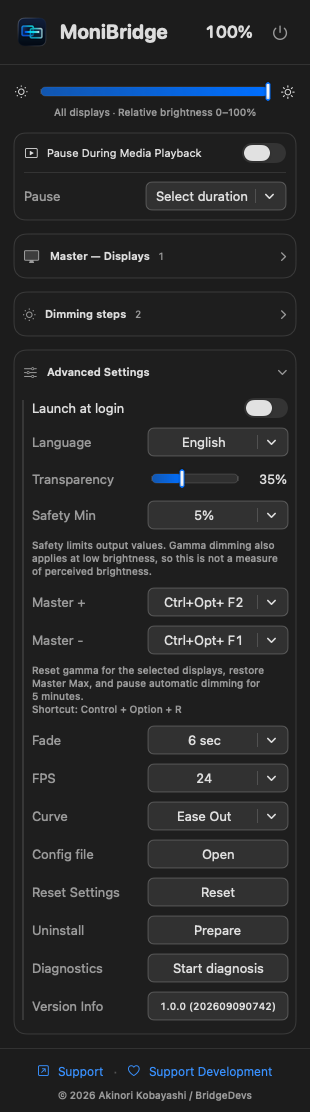
- Click the arrow on the right of Advanced Settings to expand it.
- Adjust dimming fade duration, FPS, and curve. Restoration is immediate rather than faded.
- Check Safety, the lower limit for values sent by the app; the default is 5%. To use Launch at Login, follow any approval instructions shown.
- To restore all defaults, click Reset next to Reset Settings and confirm. Dimming steps, display calibration, shortcuts, and appearance return to their defaults, launch at login is disabled, and diagnostic logs are kept.
Uninstalling MoniBridge
In Advanced Settings, click Prepare next to Uninstall. Choose Prepare and keep settings or Delete settings and diagnostics in the confirmation panel.
MoniBridge disables launch at login, reveals the app in Finder, and quits. Then move MoniBridge to the Trash in Finder. Preparation does not remove the app itself.
Keep settings if you want to reuse them after reinstalling. Choosing Delete settings and diagnostics removes saved settings and diagnostic logs. If preparation reports an error, review the message before continuing.
Images are rendered from the app’s actual SwiftUI with example settings.
Need help?
When things don’t work as expected.
Find checks for dimming failures, dimming during video, or settings that differ after reconnecting.
Open support →